Tuesday, November 8, 2011

Chocolate Drizzle Brownie Pie

Woop woop!!!! <-- That was me getting pumped up for a month full of Thanksgiving desserts! And when it comes to my favorite day of the week.......


SWEET TOOTH TUESDAY!!!!!

........we are tackling PIES for the month of November!!! And by "we" I mean me....but I sure do hope you will join me and try some of these delicious holiday recipes. So why pies? Well simply put, pies are the reason I gain ten pounds every Thanksgiving. Delish! I have three Tuesdays until Turkey Day so that gives me three opportunities to offer up some new and unusual pies that I've never tried before. I won't bore you dishers with pumpkin, apple or cherry pies (although those three are my favorites)....but instead I'll be searching for three that you might want to introduce to this year's Thanksgiving table to shake things up a bit. The great thing about today's pie is that it can be made for any occasion. It is both unique and very pleasing to the eye! In the words of my hubby, "that pie looks pretty." ;)

Ok, I can't give you the recipe yet. I have a couple confessions. First of all, the name is deceiving. I never actually did the drizzling part. I really thought the pie looked purty enough without me messing it up with less than perfect swirls of chocolate. I'm sure if you own drizzling skills it would only add to the beauty of this pie....have at it friends! I'll keep the drizzling to you. My second confession: I am terrified of making pies. This is the first pie I've ever made. So I guess that answers your question about whether or not I made a homemade pie crust. That's a big fat negative! Here's something to add to your "thankful" list....Pillsbury refrigerated pie crust!


Ingredients:

*1 Pillsbury refrigerated pie crust
*1 package cream cheese
*3 Tbsp sugar
*1 tsp vanilla
*2 eggs
*1 box fudge brownie mix
*1/4 cup vegetable oil
*3 Tbsp water
*1/2 cup semi-sweet chocolate chips
*1/2 cup chopped pecans
*1/4 cup milk chocolate ice cream topping

Directions:

1) Preheat over to 350 degrees

2) Follow instructions on pie crust package for setting it in pie pan

3) Combine cream cheese, sugar, vanilla and 1 egg in a bowl. Beat with mixer until smooth.

4) In a large bowl, mix brownie mix, 1 egg, oil and water. Beat 50 strokes. Spread half of brownie mixture into raw pie shell.

5) Carefully spread cream cheese mixture over brownie layer. Sprinkle chocolate chips over cream cheese layer; top with remaining brownie mixture and sprinkle nuts on top.
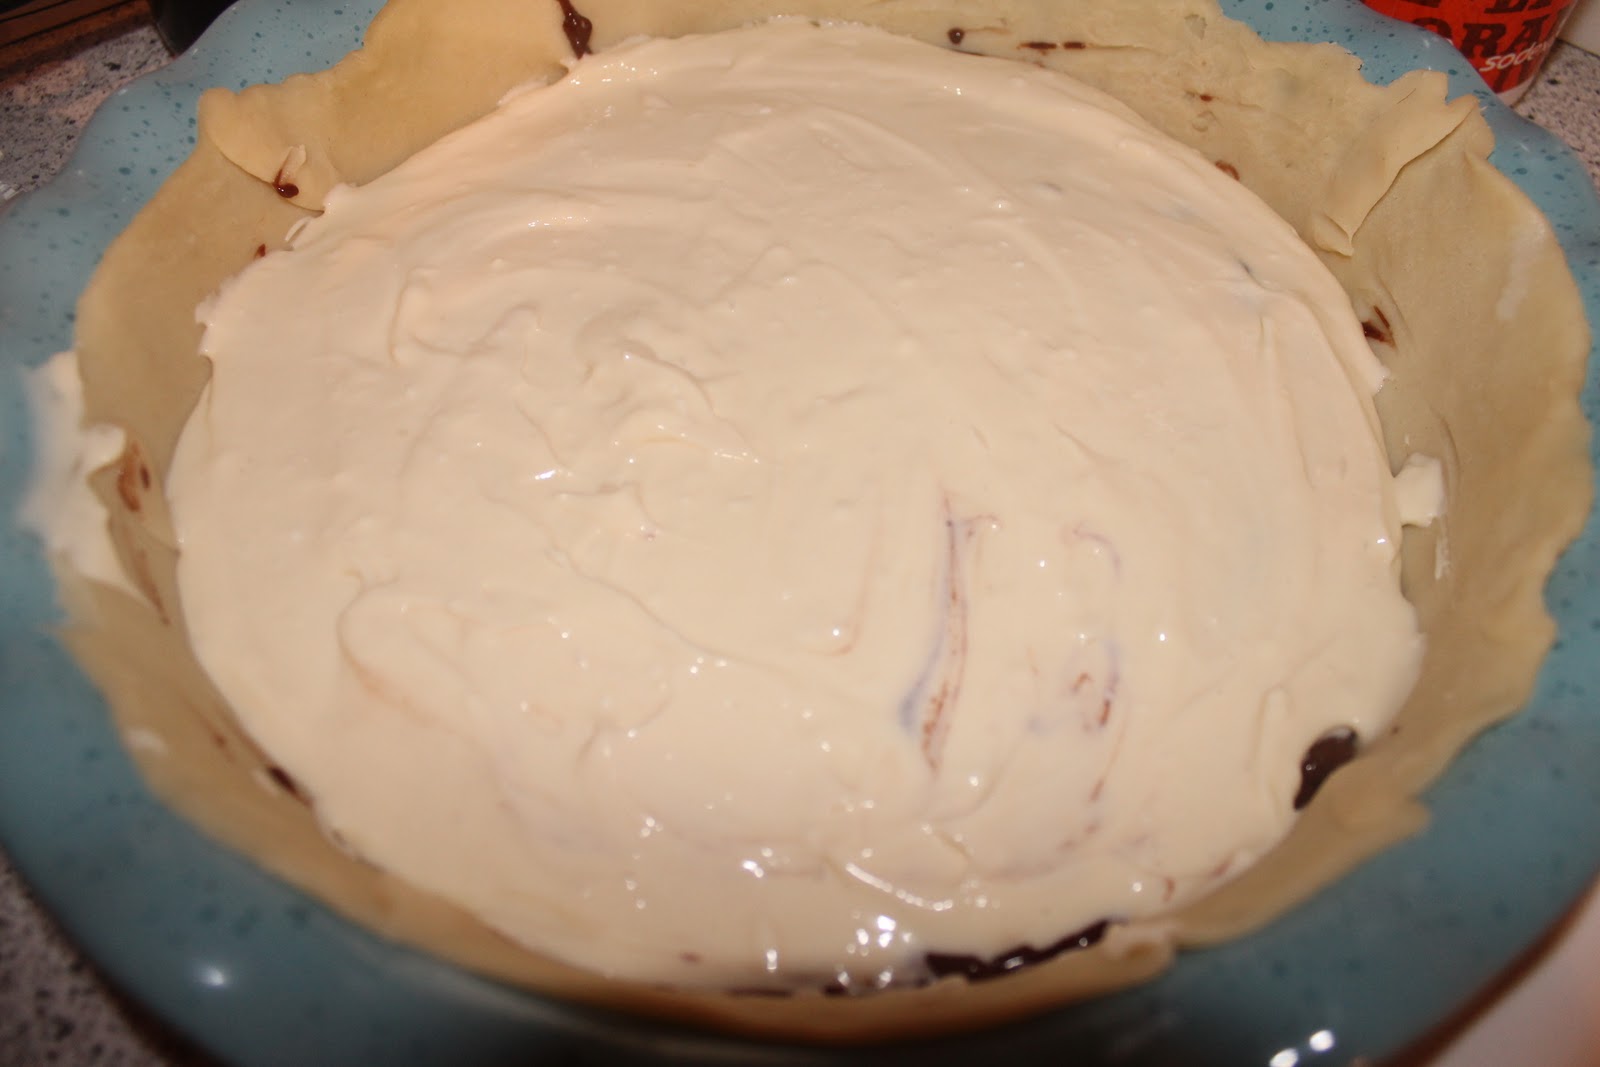

6) Bake for 40-50 minutes or until center puffs and crust is brown. Warm sauce in microwave.


Pretty

As usual I couldn't wait to dig into the chocolaty goodness and I cut a slice too soon....it just tasted like a really, really, extremely hot brownie! Be patient, grasshopper. Oh yeah, and one more thing.....ENJOY!!


GOT MOTIVATION?

Monday, November 7, 2011

Electronics for Dummies

Although I can usually be found with a phone in my hand and a computer on my lap each night, I would put myself in the dummy category when it comes to electronics. I keep it simple when it comes to anything techy. That's why I'm excited to share a couple new items that I have quickly fallen in love with and I'm beginning to wonder why I just now found out about them. I am posting these at the risk of looking like a behind-the-times fool but there may just be other tech dummies out there who are as surprised as I was to find such things.


#1: Laptop chill pad

So chill....

I had no earthly idea that such a device existed. Instead of using one I've been burning my lap and the skin on my thighs for months now. Not to mention raising my body temperature and arguing with Riley about whether it's hot in the house or not. To me it's always hot because this laptop is glued to my lap after 8:30 each night. I was browsing the electronic department at Walmart the other day and stumbled upon this fascinating device that I'm sure has been around since the stone age but has somehow escaped me. Ah ha!! No longer!  I snatched one of those puppies up and my lap has thanked me for it every night since then. ;)


#2: E-Touch gloves


Just your regular, everyday gloves?

Not at all!

Cool. Cool. Cool. These are too cool. Turns out they are actually to keep you cool while you are warm. What do I mean by this? Well you can stay cool by using your social media, texting and dialing on your phone while still wearing your gloves. Don't you hate it when you have to rip off one glove just to read a text or answer a call? Or the people at football games who have cut off the tip of the glove to expose their texting thumbs? No more my friends. These handy dandy gloves are everywhere these days apparently (or so I found out after doing a quick internet search). Like I said, I'm behind with the times. But for those of you still in Little House on the Prairie times with me, these gloves are the best invention since the snooze button. Mine are from Posh in Enid but I found many different brands after searching Amazon.

There you have it....I'm a dummy. And if you are too then maybe now you are a little less of a dummy. ;) But this goes both ways fellow dummies.....if you find something cool you must notify me immediately! ;)


GOT MOTIVATION?

Saturday, November 5, 2011

BONUS Dessert: Cheesecake Cookies

Who said that the dish only does desserts on Tuesdays? Well I'm changing the rules RIGHT NOW!!! I've been wanting to bake these for awhile now but keep forgetting. They are Paula Dean's recipe y'all (said in my best southern accent, of course). The most surprising part is that the recipe only calls for one stick of butter. Ok, this can't be Paula's y'all!!!


Prep Time: 10 minutes
Cook Time: 35 minutes

Ingredients:

Crust:
  • 1 cup all-purpose flour
  • 1/4 cup packed light brown sugar
  • 1 cup chopped pecans
  • 1 stick butter, melted

Filling:

  • 2 (8-ounce) packages cream cheese, softened
  • 1 cup granulated sugar
  • 3 eggs
  • 1 teaspoon pure vanilla or almond extract
  • Fresh berries and mint leaves, for garnish

Directions:

1) Preheat oven to 350 degrees F.


2) Combine flour, brown sugar, pecans, and butter in bowl. Press dough into an ungreased 13 by 9 by 2-inch pan. Bake for 12 to 15 minutes or until lightly browned.


3) For filling, beat cream cheese and granulated sugar together in a bowl until smooth, using a handheld electric mixer; add eggs and extract; beat well. Pour over crust.


4) Bake for 20 minutes. Cool completely.


5) Cut into squares before serving.


Here's a tip from yours truly....make sure and don't forget to follow step #2. Yeah, that's right. I didn't bake the crust first and only realized this midway through baking the cookies. Which tells me two things. #1, I need to pay more attention. #2, these cookies can only get more delicious is I follow the directions!? I threw some pretty blueberries and raspberries on top to pretty it up. The taste speaks for itself so no pretties needed if you don't already have any ready in your fridge. Oh yeah, one more thing....ENJOY!!


GOT MOTIVATION?

Thursday, November 3, 2011

New Recipe Night: Taco Casserole

I'm sitting here about to type out tonight's recipe and I open my internet browser on my phone to copy the ingredients....something in the web address catches me eye....I notice the name of the site....


It has the words "kids" and "cooking" in it.


And now I almost don't want to share my recipe because I feel silly.


I wanna say "hey now, it totally took some skill to stir the cheeses up and layer this dish!!"


Right?


Ok, I'm over the simplicity of this recipe and ready to share with you now. Hope you enjoy this simple dish as much as we did. ;)


Ingredients:
  • 1 lb. ground beef
  • 2 cups tomato salsa
  • 1 cup canned black beans, rinsed and drained 
  • 1 cup sour cream 
  • 1 cup cottage cheese
  • 2 cups shredded Mexican cheese blend
  • 2 cups tortilla chips
Directions:

  1. Preheat oven to 350 degrees F. Spray a 9 x 13 baking dish with cooking spray.
  2. Heat a large skillet over medium heat. Add ground beef.
  3. Add salsa and black beans. Cook 1-2 minutes to allow flavors to come together. Remove from heat.
  4. In a small bowl, stir together the sour cream, cottage cheese and 1 cup of the shredded Mexican cheese.
  5. Scatter half of the tortilla chips over the bottom of the prepared pan.
  6. Top with half of the meat mixture, then all of the cottage cheese mixture.
  7. Spread the remaining tortilla chips on top. Sprinkle with the remaining meat mixture and remaining shredded cheese.
  8. Cover with foil and bake 15 minutes. Remove foil and bake another 5-10 minutes until cheese is melted.

It's melted!!

Ok, not gonna lie, I still feel silly for sharing something from a kids cooking website. But the great thing is that it was yummy, quick, easy.....it took a whole 35 minutes. Oh yeah, one more thing....ENJOY!!


GOT MOTIVATION?

Wednesday, November 2, 2011

New Recipe Night: Tomato and Sausage Rigatoni

I was totally blown away by last night's recipe! I knew I wanted some form of pasta and after the idea popped into my head I wasn't going to be satisfied until I had CARBS! I found this recipe online while searching for something that had a protein besides chicken or beef. I had never cooked with sausage or italian tomatoes before and was excited to try something completely new....but I guess it probably comes as no surprise that most recipes are completely new to me considering that this cooking thing is new and all. Once I searched the store high and low for Italian stewed tomatoes I couldn't wait to get home and get to cooking. Hold onto your socks because this spicy and peppy dish will have you eating seconds. Seriously, so good.


Ingredients:


*2 tablespoons olive oil
*1 medium sweet onion, diced
*1 pound sweet Italian sausage meat (stuffing from 4 links)
*1/2 teaspoon red pepper flakes
*salt to taste
*1 35oz can imported Italian tomatoes
*6 fresh basil leaves
*1 pound rigatoni


Directions:


  1. Heat olive oil in a medium sauce pan over medium-high heat. Add onion and sautè, stirring occasionally with a wooden spoon until softened and translucent, about 5 minutes.
  2. Add sausage meat, red pepper and salt to taste. Cook, stirring occasionally until sausage is browned approximately 10 minutes.
  3. In a large bowl, crush the tomatoes with your hands then add them with their juices to the pan. Add 1/2 cup of water and bring to a simmer. Turn heat to low and let simmer until thickened, about 45 minutes. At the very end of cooking, tear 2 of the basil leaves into pieces with your hands and stir into the sauce.
  4. While sauce is cooking, bring a large pot of salted water to a boil and add the rigatoni. Cook uncovered over high heat until al dente.
  5. Drain the pasta and toss with half of the sauce. Dish pasta out into individual serving plates, top with a little more sauce, garnish with the remaining basil leaves torn by hand and serve
I tweaked the recipe a little bit. Walmart did not offer me the fresh basil that I was looking for so I settled for basil from a jar. As usual I didn't read the recipe ahead of time and missed the part about simmering for 45 minutes. Even if I had read it ahead of time I probably still couldn't have waited that long. Flour to the rescue. I tossed in a couple spoonfuls of flour to speed up the thickening process. I let it simmer for about 25 minutes while sprinkling in several extra shakes of red pepper....did I mention that it was SPICY!?!? And did I mention that this has been my favorite Pink Dish recipe thus far? Well it is!!! I'm excited to have a new alternative to regular spaghetti meat sauce. I far prefer this to a jar of Prego...yep, that used to be my specialty! Bon Apetit, right? No more Prego for this girl!


Oh yeah, one more thing.....ENJOY!!


GOT MOTIVATION?

Way Back Wednesday

Way back when......


I began Operation Happy.


Before


Before


Is anyone else out there holding onto a box of your former "skinny clothes" that you are having a hard time letting go because you just might fit into them someday soon. Well that's been me for the past five years. I recently parted ways with my "skinny clothes" much to the shagrin of my husband.....how ever will he poke fun at me? I think he thought I would carry that famous box around until I was 40 years old. The funny part is that I could actually fit into some of the clothes in that box when I sold them in the garage sale last month. Problem is they were so outdated that I wouldn't have wanted to wear them. ;) I forged a new beginning back in mid-March and haven't looked back since. I first wrote about Operation Happy on my family blog after returning from an eye-opening girl's trip to Dallas with my best friends. I was so inspired by the transformation I've seen in my friend Ashley over the past few years and found myself envious of her healthy eating habits that she's made a part of who she is. We made a pact to be eachother's accountability partners and it worked surprisingly well. My friend Heather has been on a journey of weight loss right alongside me and she has shrunk back down to her high school size and looks stunning! I've slowly but surely made some big changes in my eating habits and exercise regime. Over the past seven plus months I'm ecstatic to say that I've watched 20 pounds disappear and have dropped three pants sizes. It seems hard to wrap my mind around this because I still feel like that post-baby momma wearing my pants high to cover up my big belly and hiking up the back of my jeans to cover up my lovely muffin top. Oh the joys of motherhood!


One of the biggest milestones was getting back down to my pre-baby weight. If I recall correctly it took right around ten months. Ten months to put it on, ten months to take it off. Oy! My next goal to tackle was to get down to pre-real world weight. The moment I finished grad school I began a slow spiral into unhealthy eating habits and a very poor commitment to working out. I'm going to blame most of it on my job. We placed a lot of emphasis on mealtime which was a great way to distract us from work but it was also a great way to expand my waist at the same time. After failing miserably at "The Biggest Loser" work edition twice, I was getting pretty discouraged and dare I say a bit depressed about never getting the weight off. The part that frustrated me the most was that I didn't have an awful lot to lose but instead of chipping away at it slowly I just kept gaining little by little because I'd already given up.


Weight has always been a struggle for me since leaving the nest and heading to college. The freshman fifteen did not have mercy on me and brought along it's friend freshman five which left me at 20 pounds heavier after just one year. I've bounced from 135 to 180 to 138 to 160 to 165 and now finally back down to a comfortable number. I'm going to go ahead and blame the 180 on my first year of grad school. Those darned Panera cookies and soup were way too good while studying my life away. ;) My saving grace was ironically when the hubs was deployed to Iraq. I dropped a whopping 42 pounds while he was away over the course of eight months. That time and this time I've used the same method: counting calories, cutting caffiene and exercising on a daily basis.


So while this blog is a celebratory look back at the journey, I can't help but wonder what the secret is to keeping the weight off.....for good. "Eat in moderation.....small portions....exercise....cut the caffiene....limit the salt....blah blah blah." I know the answers but how do we live by these rules that we know so well. Discipline. I guess that's the real answer. Ironically, I am typing this as I eat one of my freshly baked cupcakes at midnight. How's that for discipline!? Actually I choose to look at it as my celebratory treat! Here's to keeping this weight off and then some......seven more pounds and a lot of toning to go! I'm taking applications for workout partners who don't mind a screaming baby in a stroller while you are running beside me. I know, I make it so enticing, right? ;) Even though I've used the 's' word (skinny) a lot I'm not saying that being skinny is the answer. It's being healthy. We only get one chance at life....live it well.


If you are reading this and you are holding onto some pesky pounds that you'd like to say goodbye to, please don't wait. Don't say "I'll start Monday" because you won't start Monday. Don't forget how great it feels to slide into your "skinny jeans." And for heaven's sake, don't eat a cupcake at midnight. ;)


After


After


Tuesday, November 1, 2011

Halloween Peanut Butter Oreo Brownie Bars


HAPPY SWEET TOOTH TUESDAY!!!!
 
Am I the only one who looks at this picture and want to reach through the screen and shove it in my mouth?!?!? Well assuming that there are more of you out there I thought I'd share this decadent treat with you! I found it by googling Halloween treats...and up popped this three layered dessert. Three layers. Count em!! 1,2,3!! One layer of peanut butter cookie with Reese’s Pieces, one layer of Oreos and finally a layer of fudge brownies. On one hand that is three times the goodness. On the other hand it’s three times the calories. But we will try our best to forget about that part. So we are past the calories? Ok, great! On to the goodness!! I realize that this is a little late for Halloween but you'll see below that it can be an anytime kinda treat as well!


Ingredients:


1/2 cup butter, softened
1 cup peanut butter
1/2 cup white sugar
1/2 cup brown sugar, packed
1 egg
3 tablespoons milk
1 teaspoon vanilla extract
1 1/4 cups all-purpose flour
3/4 teaspoon baking powder
1/4 teaspoon salt
1 (9.9 oz) pkg white chocolate candy corn M&Ms or 1 cup Reese’s Pieces
1 pkg Halloween or Double Stuffed Oreos
1 Family Size (9×13) Brownie mix
1/4 cup hot fudge topping


Directions:


1) Preheat oven to 350 degrees.


2) Cream the butter, peanut butter, and both sugars in a large bowl with an electric mixer on medium speed for 3-5 minutes. Add the eggs, milk and vanilla and beat until dough is light and fluffy.


3) In a separate bowl, whisk together the flour, baking powder and salt, then slowly add to the mixer until the flour is just combined. Stir in M&Ms.


4) Spray a 9×13 baking dish with cooking spray, line with wax paper, and spray with cooking spray again.


5) Spread the cookie dough in the bottom of the dish. Top with a layer of Oreos.


This is where it was really hard not to just eat the entire middle layer before baking....


6) Mix together brownie mix, adding an optional 1/4 cup of hot fudge topping to the mix. Pour the brownie batter over the cookie dough and Oreos. Bake at 350 degrees F for 45-55 minutes, until a toothpick inserted 2″ from the edge comes out with moist pieces clinging to it.


A few tips to help with the cutting process…wait a very long time to cut them!! I tried a few times too soon and ended up with a crumbly/gooey mess. Make sure and give them plenty of time to set up before you slice them. The waxed paper is a bit of an annoyance when cutting....next time I think I'll just leave it out and Pam it up a little extra. ;) My lil sweetie and I handed out these bars while trick-or-treating on Halloween night. They don't have to be Halloween treats exclusively though....just replace the Reese's Pieces with M&Ms and use Double Stuffed Oreos instead of Halloween oreos. Oh yeah, one more thing….ENJOY!!


GOT MOTIVATION?