Thursday, December 8, 2011

Tis the season....

......to be a horrible BLOGGER.

Shame, shame on me. Not only did I skip my favorite day of the week (Sweet Tooth Tuesday) but I have been having rummaging through my pantry for anything I can use to whip up super quick dinners lately. No new recipes for this family until after the holidays. :( Rest assured, The Pink Dish will return! I was so looking forward to lots of holiday treats and fun traditional recipes but it somehow didn't make the priority list. I do miss the kitchen terribly but I'm trying to get my new kitchen ready to start whipping up yummy stuff again. The calendar seems to be overloaded with family celebrations and parties, lots of shopping left to do, wrapping to do and painting, painting, painting. It's get up, go to work, feed baby and husband, go paint, get to sleep by midnight. Start over the next day. Don't give up on me readers.....I shall retrurn to the kitchen and blog scene soon. Thanks for reading! <3

P.S.- if anyone has mastered the stress-free holiday season let me know the secret. I'd love to be a part of this!!!!


Tuesday, November 29, 2011

Almond Bark Popcorn

What do you get when you have 2 saltys + 2 sweets?? It = an addicting and yummy treat! I'm sure you guessed which direction I would be headed in and you are right!!! It's time for some holiday goodies! I look forward to making this each Christmas. The best part is that is doesn't involve a recipe. Just three simple steps! That's something to shout about! This treat takes about fifteen minutes to make and will make a great little snack for any holiday party or just to have around the house to munch on while you deck your halls. This next month will be full of holiday cookies and treats to treat your sweet tooth! I can't wait!

HAPPY SWEET TOOTH TUESDAY!!!


Ingredients:


* 1 bag of microwave popcorn
* 2 cups of chex mix
* 1 large bag of peanut butter M&Ms
*1 package of white almond bark


Directions:

1) Melt the almond bark on low heat in a pan on the stovepot.


2) Combine popcorn, M&Ms and chex mix in a very large bowl and pour melted almond bark on top. Using large spoon or spatula stir the mixture well to coat with the bark.


3) Spread out on a flat pan to dry. Separate into clear holiday treat bags to pass out to your friends or just serve from a large bowl.


You might try putting some waxed paper down on the pan so that it won't stick. My bad. ;) In the past I've microwaved the bark to melt it which resulted in second degree burns on both hands while I tried to mix it. STUPID! One year I even thought wearing latex gloves would help keep from getting burned. Nope. STUPID! I guess all it takes to keep from being scalded is by melting it in a pan. Please, please, please promise me you won't microwave your almond bark. Promise? Oh yeah, one more thing....ENJOY!!


GOT MOTIVATION?

Sunday, November 27, 2011

New Recipe Night: Tator Tot Casserole

A childhood favorite for sure. During my grade school days I adamantly refused to eat the cafeteria food. Instead I requested a turkey sandwich on white bread with a sprinkle of pepper along with a bag of Doritos and a cheese stick EVERYDAY for lunch. It was as simple as that. I didn't envy watching my classmates eat from their trays and drink their little milk cartons. But there was one exception....that was on tator tot casserole day. On some occasions when it was this day I would try to bargain with my friends to set up a lunch room trade. It turns out I'm the only person who liked a plain turkey sandwich. I would sit there picking at my sandwich while I watched them eat what I wanted. This usually led to me requesting the tator tot dish when I got home after school. Thankfully I had a wonderful mother who obliged. ;) Here's my lunchtime favorite and I'm sharing it with you....


Ingredients:


*2 lbs. ground beef
*salt and black pepper, to taste
*1 can cream of mushroom soup
*1 cup sour cream
*2 cups shredded cheddar cheese
*1 package frozen tater tots


Directions:


  1. Preheat oven to 350 degrees F. Spray a 9 x 13 pan with cooking spray.
  2. Brown ground beef. Season with salt and pepper, while browning. Drain.
  3. Spread ground beef in the prepared baking dish. Whisk together soup and sour cream. Spread over ground beef in an even layer.
  4. Sprinkle one cup of cheddar cheese over the soup layer.
  5. Top with tater tots.
  6. Bake 30 minutes. Sprinkle remaining cheese on top. Bake another 5-10 minutes until cheese is melted.


This was my first time to make it myself. I have no idea why it has taken me this long considering it takes about two seconds to prepare. And I don't think I've eaten this since I was fifteen so it only made it that much tastier. Guess who also shares my love for this oh so simple dish?? My daughter and husband!! Oh yeah, one more thing....ENJOY!!


The half tator-tot missing is thanks to my hungry hubby


GOT MOTIVATION?

Tuesday, November 22, 2011

Key Lime Pie

Happy Tuesday Dishers!

It's my favorite day yet again...

And the last Tuesday for Thanksgiving PIES.....

HAPPY SWEET TOOTH TUESDAY!!!

Do you have that one dessert that you can't say no to. That one dessert that is impossible to resist. Well hello key lime pie, don't mind if I do! It seems incredibly strange to be excited about cooking and baking lately. I still can't get used to the fact that I get antsy when I'm not cooking. I look forward to Tuesday for several reasons now: it's my day off work, it's my day to spend with my daughter and it's the day that my house is filled with yummy smells of sweet treats baking in the oven. This week was no exception and it only seemed that much more appropriate with it being Thanksgiving week. The first Thanksgiving that I've been excited about the cooking part. I've volunteered to make three dishes for our celebration this year. That may sound silly and not worth a lot......but let's put it this way....I'VE NEVER MADE A DISH FOR THANKSGIVING.....EVER. This Tuesday's treat happens to be one of the dishes I'm taking with me to share with my family. We all seem to share a love for key lime pie so I'm sure it will be a favorite! I made Tuesday's treat on Sunday and made sure it found a home away from my tummy....the pie found its new home in my in-laws fridge. :) I have no idea why I've never considered baking a key lime pie before....now that I know how easy it is I feel like it's probably a good idea I never did before. It's so sweet it must be a sin.


Ingredients:

*1 1/2 cups graham cracker crumbs
*1/2 cup granulated sugar
*4 tablespoons (1/2 stick butter) melted
*2 (14-ounce) cans condensed milk
*1 cup key lime or regular lime juice
*2 whole eggs
*1 cup sour cream
*2 tablespoons powdered sugar
*1 tablespoon lime zest


Directions:


1) Preheat the oven to 375 degrees F.
2) In a bowl, mix the graham cracker crumbs, sugar, and butter with your hands. Press the mixture firmly into a 9-inch pie pan, and bake until brown, about 20 minutes. Remove from the oven and allow to cool to room temperature before filling. Lower the oven temperature to 325 degrees F.


3) In a separate bowl, combine the condensed milk, lime juice, and eggs. Whisk until well blended and place the filling in the cooled pie shell. Bake in the oven for 15 minutes and allow to chill in the refrigerator for at least 2 hours.


4) Once chilled, combine the sour cream and powdered sugar and spread over the top of the pie using a spatula. Sprinkle the lime zest as a garnish on top of the sour cream and serve chilled.

Oh my sweet tooth!!!!!!!!!! This is the tartiest, tangiest, sweetest creation thus far that I've made. And did I mention that key lime is my absolute favorite?!?! Oh yeah, one more thing....ENJOY!!


GOT MOTIVATION?


Saturday, November 19, 2011

New Recipe Night: Easy Mexican Meatloaf

I can never go wrong with meatloaf around here. It definitely falls into the "can't go wrong" category. I don't use a recipe...but instead just toss eggs, ground beef, a variety of seasonings, cracker or bread crumbs and ketchup in a bowl and get to mixin'. I decided to change things up a bit and add some kick to the meatloaf. I'd heard of Mexican style but had never tried making it before. After doing a quick search I realized that it may be more complicated than I had imagined. I was looking for easy and I found very difficult with lots of meats that I'd never heard of and words that I didn't know the definition of. No beuno! I have no idea why a Mexican meatloaf needed to be that complicated. So I added the word "easy" to my search and up popped this great quick recipe....


Ingredients:


  • 2 lbs lean ground beef (or can use ground turkey)
  • 1 cup corn chips, crushed
  • 1/3 cup taco sauce
  • 2 tablespoons taco seasoning mix
  • 1 egg, beaten
  • 1/2 cup Mexican blend cheese, grated


Directions:


1) Mix all the ingredients together and place mixture in a loaf pan


2) Cook in a pre-heated oven at 350º for about 40-45 minutes until meat is well cooked from inside


3) Or cook in a crock pot on high for about 3-1/2 to 5 hours, or low for about 8 to 10 hours


This meal served us for two nights! The second night I made meatloaf sandwiches with it and the hubs was a happy man. Don't make it unless you have time to wait though....in other words, don't start preparing it at 7:30 like I did. It took about 80 minutes to cook!! It's my meatloaf curse so maybe you will have better luck. The taste is splendid though! Just a little something different from your regular ol' loaf of meat (makes it sound so enticing, right?)   ;) If you don't like spicy then add a little less taco seasoning. I added extra and it was HOT!!! Oh yeah, one more thing.....ENJOY!!

GOT MOTIVATION?

New Recipe Night: Slow Cooker Chicken & Dumplings


I guess I should say "New Recipe Day" because we chowed down on this meal for a nice Saturday lunch. I had planned on it being nice and chilly outside but the weather did not get the memo that I was making a nice cozy dish for cold weather. You can eat chicken and dumplings when it's in the mid 60s right? Sure ya can! This was my first Pinterest recipe attempt. I've been pinning recipes for about a month now and finally got around to actually looking at a real recipe and not just the picture of it. This pin just kept popping up and yelling at me..."make me!!!! make me!!!!" Am I the only one that pins, pins, pins but never actually looks at the recipes? I think I'll be pulling a lot of recipes from my A is for Appetite board because this recipe was out of this world yummy and so so so easy! Here's why....


....when I think of crock pot recipes I always assume it's going to have to cook overnight or be put in of a morning and be ready for dinner. Well not this recipe. I started cooking it at 8:00 and it was in a bowl in front of me at noon. How's that for crock pot cooking!? The recipe calls for 4-6 hours of cooking the chicken but mine was ready after 3 1/2 hours. The smell had infiltrated every corner of the house by the time I returned from a shopping trip this morning. I couldn't wait any longer to add the "dumplings." This will for sure be a new Fanning favorite!


Ingredients:


*1lb of Boneless Skinless Chicken Breasts (3-5)
*2 Tablespoons Unsalted Butter
*2 cans Cream of Chicken Soup
*1 can Chicken Broth
*1 medium White Onion, diced
*4 Large Flaky Refrigerator Biscuits


Directions:

1) Place chicken in crock pot and top with butter.  Add cream of chicken soup, chicken broth and diced onions.  Cook on High for 4-6 hours.

2) Remove chicken from crock pot and use a fork to shred.  Return chicken to the crock pot.  

3) Cut each uncooked biscuit into 9 pieces and stir into the chicken mixture.  Continue to cook on High for 30 minutes.  Serve hot. Makes about 6-8 servings.

The buscuits puff up a lot more than I'd expected which made for a bigger crock pot full that I'd expected....which makes for a very full stomach now! I almost think you'd need two seperate crock pots if you wanted to double the recipe for a large group. Otherwise your buscuits would want to overflow! Next time I'm going to cut back on the onions...makes for great flavor but oh how I hate the texture of biting into a piece of onion (baby steps, people, baby steps). Oh the creaminess makes my mouth water just thinking about it. I can't think of a more perfect, simple and comforting meal than this! Oh yeah, one more thing....ENJOY!!


GOT MOTIVATION?

Monday, November 14, 2011

New Recipe Night: French Dip Sandwiches

I did something bad. Something very, very bad. I tried out a new recipe....a very delicious and lip smacking one in fact....without taking one single picture. I'm just going to go out on a limb and say that blogs are pretty yawn-worthy if no pictures are involved. Well if you are already reading please don't stop now! I promise that the taste of this one is so worth reading through this post with (gasp) no pictures. Geez, I'm boring myself.....so just for the sake of putting some color into this post I'm going to throw in a picture of something similar....


Ingredients:


*1 boneless beef roast
*1/2 cup soy sauce
*1 beef bouillon cube
*1 bay leaf
*3 whole black peppercorns
*1 tsp rosemary
*1 tsp thyme
*1 tsp garlic powder
*1 loaf of french bread


Directions:


1) Remove and discard all visible fat from the roast. Place trimmed roast in a crock pot.


2) In a medium bowl, combine soy sauce, bouillon, bay leaf, peppercorns, rosemary, thyme, and garlic powder. Pour mixture over roast and add enough water to almost cover roast. Cook on low heat for 10 to 12 hours or until meat is tender.


3) Remove meat from broth, reserving broth. Shred meat with a fork and place on bread for sandwiches. Use broth for dipping.


HOLY BROTH!!!!!!!!!!! This stuff was like crack! Not that I know what crack is like but I'm sure it has to be right up there next to crack. I am embarrassed to admit that I probably ate half of the roast. No, seriously. I was that excited about it! I put up about ten thousand post it notes this morning to remind me to put the roast in the crock pot. The notes worked and as a result I couldn't get my mind off of the yummy juices cooking all day long for my dipping pleasure. I'd never made the broth before because I always took the easy route and grabbed a package of Au Jus mix at the grocery store. This stuff kicks Au Jus package's butt!!! Oh and promise me you won't eat a french dip sandwich without adding a slice of swiss cheese!!!


Oh yeah, one more thing....ENJOY!!


(Insert yummy, picture on a colorful plate)


GOT MOTIVATION?

Creamy Lemon Raspberry Pie

It's still PIE MONTH and I've churned out another new pie option for your Thanksgiving celebration this year. This one happens to be super simple and super sweet! Yep, it's my favorite day again.....

HAPPY TREAT YOUR SWEET TOOTH TUESDAY!!!

I'm not sure why but this recipe makes me giggle because all I can seem to think about when I see it is that Friends episode where Rachel is in charge of making a truffle and Joey is naming off all of the layers that he loved so much. That's not to say that I made the same mistake that Rachel made by combining two recipes....it would've been pretty dang hard to mess up this recipe. I guess it was the raspberry jam on the ingredient list that reminded me of that funny episode. Jam? GOOOOOOOOOOD!!


Ingredients:


* 1/4 cup seedless red raspberry jam
* 1 premade shortbread crumb crust
* 1/2 pint (about 1 cup) fresh red raspberries
* 4 ounces cream cheese, softened
* 1 (12-ounce) can evaporated milk
* 2 packages lemon instant pudding and pie filling mix
* Grated peel of 1 lemon
* 1 (8-ounce) container frozen whipped topping, thawed
* Additional grated lemon peel (optional)


Directions:

  1. Spread raspberry jam over bottom of crust. Sprinkle 3/4 cup raspberries over jam.
  2. Beat cream cheese in large mixer bowl until creamy. Gradually add evaporated milk, pudding mixes and lemon peel. Beat for 2 minutes on medium speed until well blended. Gently stir in half of whipped topping. Spoon into crust; top with remaining whipped topping.
  3. Refrigerate for 2 hours or until set. Garnish with remaining raspberries and additional lemon zest, if desired, just before serving.

This pie is simply refreshing. I love the taste of lemon. Tastes so sweet.....mixed with the tartness of the raspberries leaves the perfect mixture of goodness in your mouth. I also love layers. The way they look when you cut into the pie and the way they all mix together to give you a variety with every bite. ;) The layers did not turn out as pretty as the example picture but that rarely happens so I'll just try and be satisfied with it's prettiness. Oh yeah, one more thing.....ENJOY!!


GOT MOTIVATION?

Saturday, November 12, 2011

INSANITY 60 Day Challenge

Talk about needing motivation!! Committing myself to the INSANITY 60 Day Challenge has forced me to do some deep digging into my mind to convince myself that I can stick to this. Like I've mentioned before, I was introduced to these workouts at Wednesday night devotional group. I've been doing it once a week for the past couple months. I may be crazy but I swear that I could see a difference just getting my extreme cardio on once a week. Crazy, huh? So if once a week can make a difference (along with running and other exercise of course), then what would six days a week do?!? My challenge arrived on our doorstep a week ago and I began on Tuesday. There is a specific calendar to follow which I semi-plan on doing. Sunday is a rest day when I plan on just walking. The workouts are INSANE....but do-able! The feeling when you get done with each workout is totally worth every drop of sweat. Sean T is my new boss and tells me what to do.....


"Hey y'all. I'm about to make you wish you had never purchased this workout."

Although he pushes you to your absolute limit I must say he is much less annoying than most instructors on exercise videos. Don't even get me started on Maury Windsor on the Pilates videos!!!! Makes me want to scream and reach through the tv and wipe the smile off her face.

I should've seen this coming but I seem to always forget. The harder the workout, the greater the appetite. Sean T tells me at the end of each workout "make sure you eat and drink something." Ok, how bout some pizza and a cupcake? A diet Dr Pepper sounds good too. I have found myself thinking about food constantly. Bad food. Take this afternoon treat for example......


I haven't craved ice cream in months!! Some strange force drove my car toward Sonic and ordered it. I swear!!! I'm not going to do any "before" pictures but if I can stick with this challenge I'll post some "after" pictures. I may need to extend it out to a 90 Day Challenge since we will be doing our big move to the new house soon. I have a feeling that it might trump my workouts for a couple weeks or so. Lifting furniture, ripping out carpet, painting and unpacking will have to do Sean T.

If you want to join me in the INSANITY here's where you can find it.....

http://www.beachbody.com/product/fitness_programs/insanity.do


GOT MOTIVATION?

Thursday, November 10, 2011

Random Ramblings

As I was flipping through the channels during my oh so exciting treadmill punishment last night, I stumbled upon a movie I'm quite fond of....Julie & Julia. It hadn't dawned on me that I had a lot in common with the younger character in the movie. She had started a cooking blog. The more I watched, the more I realized that I was missing a very crucial part of becoming a natural in the kitchen. Key word = becoming. Which brings me to this question......


WHERE THE HECK IS MY APRON!?!


Oh, that's right, I don't have one. To be legit does one not need to have an apron on at all times when in the kitchen? YES!!!!!! But it has to be extra messy with ingredients rubbed on it and a little bit of flour on your brow. Well, I may not have any of those things but I do have this now......


2 Legit 2 Quit

I've gone as far as asking for a baking accessory for my birthday. This cooking thing is getting serious. ;) Which brings me to my next question.......

AT WHAT POINT DOES ONE BECOME A GOOD COOK?

I always thought it was a skill you were either born with or not. For example, my mother and mother-in-law must've been born with the ability to make delicious, nutritious and quick meals that resulted in happy families.So what makes a "good cook?" Is it a person who can create delicious complicated meals with ten thousand ingredients? Is it a person who can get home from work at 5:00 and have dinner on the table by 5:30 with a kid hanging from their leg all the while? Is it a person who makes a complete and total mess of the kitchen, takes an hour to get a meal on the table but it tastes good? I don't mean to disappoint when I say that I don't know the answer. But what I do know is that each day cooking seems to get a little easier....I feel like the clumsy me who used to timidly approach a recipe is a girl I don't know anymore. I feel more in charge now.....sometimes I feel like shouting at the recipe..... "I OWN YOU RECIPE!!" I feel like I've sprouted a couple extra hands in the kitchen. I have embraced my cooking drawer. Is it strange that I actually get excited to get my handheld mixer out. Mind you, this used to be one of my most dreaded things. I hated the thought of having to pull the box down, hunt down the beaters and unplug an appliance just to plug in the mixer. Sometimes I would just ignore when a recipe called for using a mixer. I'd stir really really fast instead. ;) I was not a big fan of using more than one bowl. If a recipe asked for two separate bowls for two seperate mixtures it didn't matter to me. I would tell myself "everything ends up mixed together anyways so might as well use one bowl." Another popular mindset was this: "more cooking only means more dishes."

So what's all this rambling about? I guess my point is that everyone can be a good cook. With a little work and a good effort you might actually find that it's (gasp) fun. You don't have to be born with the ability and you sure as heck don't have to grow up loving to cook. I never understood the joy of cooking and the whole "made with love" thing. The upcoming holiday season has be almost giddy about trying new recipes and sharing them with my family. It may not taste like Julia Child made it....but these days my food is definitely full of love.

Here's to your cooking adventures......

.....may they be as fruitful as mine have been so far.

Thanks for reading Pink Dishers!


Wednesday, November 9, 2011

New Recipe Night: Crock Pot Beef Stew

It's raining...

It's pouring...

The little baby's snoring....

That can only mean one thing....

Time to try a new recipe!!!

I love Tuesdays oh so very much and can always count on having enough energy to cook. I was in the mood for something warm and comforting. It's a good thing we took our trip to the store early in the morning because the recipe I chose required ten hours to cook!! I love throwing things in the crock pot but I'm so bad about forgetting until it's too late to start cooking. And by late I mean 5:00 o'clock in the evening. Too late to throw in a roast for that evening's dinner?? I guess so. ;)


Ingredients:


*2 Tbsp Olive Oil
*2 lb stew meat, cut into 1 1/2 to 2 in pieces
*1 large onion
*3 potatoes
*3 carrots
*3 stalks celery
*1/2 cup ketchup
*2 Tbsp Worcestershire sauce
*1 Tbsp dark brown sugar
*1 Tbsp paprika
*2 cups beef stock
*1/4 cup water
*1/4 cup flour


Directions:


1) Heat a large pan over medium high heat. Add olive oil and sear meat on all sides then remove. Place beef in crock pot and cover with onions and vegetables.


2) In a small bowl, mix together ketchup, Worcestershire, brown sugar, paprika, dry mustard and beef broth. Pour mixture over meat and vegetables.


3) Cook on low for 10 hours. During the last half hour of cooking, mix the flour and water together and over meat and stir, then turn to high heat.


I was a little thrown off by some of the ingredients....dark brown sugar? I didn't know such a thing existed. And paprika? Isn't that just used for deviled eggs? ;) I left out the celery simply because neither my husband or I are a fan. I added some green beans to the recipe and I think next time I'll add some peas as well. It needed some more color. The meat was so tender since it has been cooking on low all day. The perfect meal waiting on the counter at the end of the day. It even made a great meal for my sweet girl. I popped some french bread with some garlic spread in the oven for a couple minutes. Very yummy for dipping in the stew! We definitely had plenty of leftovers which suited me just fine when lunch time rolled around today. Oh yeah, one more thing....ENJOY!!


GOT MOTIVATION?

Tuesday, November 8, 2011

Chinese Fried Ramen Noodles

This marks my second stab at a recipe in the famous "101 Things to Do with Ramen Noodles" book. This recipe jumped off the page at me....mostly because I saw the word soy sauce. Sodium overload was calling to me I guess!


Ingredients:

*2 packages Orientla flavored Ramon Noodles
*2 eggs
*2 Tbsp vegatable oil
*1 cup frozen peas and carrots
*2 Tbsp soy sauce


Directions:

1) Cook Ramen Noodles according to package directions. Drain and add in seasoning packets.

2) While noodles are cooking, fry eggs in vegetable oil in skillet. Cut eggs into small pieces and add to noodles.


3) Cook frozen peas and carrots according to package directions and add to noodle mixture. Top with soy sauce and stir together.

Something so simple that really doesn't require a recipe. Well when you get down to it, none of these Ramen Noodle book recipes require an actual recipe. I think I'll be making this one again on a night that I'm flying solo. The hubs wasn't a huge fan of these noodles....or really any kind of pasta in general. But my baby girl scarfed it down like she hadn't eaten in days....and trust me, she has eaten plenty in days. ;) I guess she felt lucky for getting carbs, breakfast and veggies all in one meal. Oh yeah, one more thing....ENJOY!!


GOT MOTIVATION?

Chocolate Drizzle Brownie Pie

Woop woop!!!! <-- That was me getting pumped up for a month full of Thanksgiving desserts! And when it comes to my favorite day of the week.......


SWEET TOOTH TUESDAY!!!!!

........we are tackling PIES for the month of November!!! And by "we" I mean me....but I sure do hope you will join me and try some of these delicious holiday recipes. So why pies? Well simply put, pies are the reason I gain ten pounds every Thanksgiving. Delish! I have three Tuesdays until Turkey Day so that gives me three opportunities to offer up some new and unusual pies that I've never tried before. I won't bore you dishers with pumpkin, apple or cherry pies (although those three are my favorites)....but instead I'll be searching for three that you might want to introduce to this year's Thanksgiving table to shake things up a bit. The great thing about today's pie is that it can be made for any occasion. It is both unique and very pleasing to the eye! In the words of my hubby, "that pie looks pretty." ;)

Ok, I can't give you the recipe yet. I have a couple confessions. First of all, the name is deceiving. I never actually did the drizzling part. I really thought the pie looked purty enough without me messing it up with less than perfect swirls of chocolate. I'm sure if you own drizzling skills it would only add to the beauty of this pie....have at it friends! I'll keep the drizzling to you. My second confession: I am terrified of making pies. This is the first pie I've ever made. So I guess that answers your question about whether or not I made a homemade pie crust. That's a big fat negative! Here's something to add to your "thankful" list....Pillsbury refrigerated pie crust!


Ingredients:

*1 Pillsbury refrigerated pie crust
*1 package cream cheese
*3 Tbsp sugar
*1 tsp vanilla
*2 eggs
*1 box fudge brownie mix
*1/4 cup vegetable oil
*3 Tbsp water
*1/2 cup semi-sweet chocolate chips
*1/2 cup chopped pecans
*1/4 cup milk chocolate ice cream topping

Directions:

1) Preheat over to 350 degrees

2) Follow instructions on pie crust package for setting it in pie pan

3) Combine cream cheese, sugar, vanilla and 1 egg in a bowl. Beat with mixer until smooth.

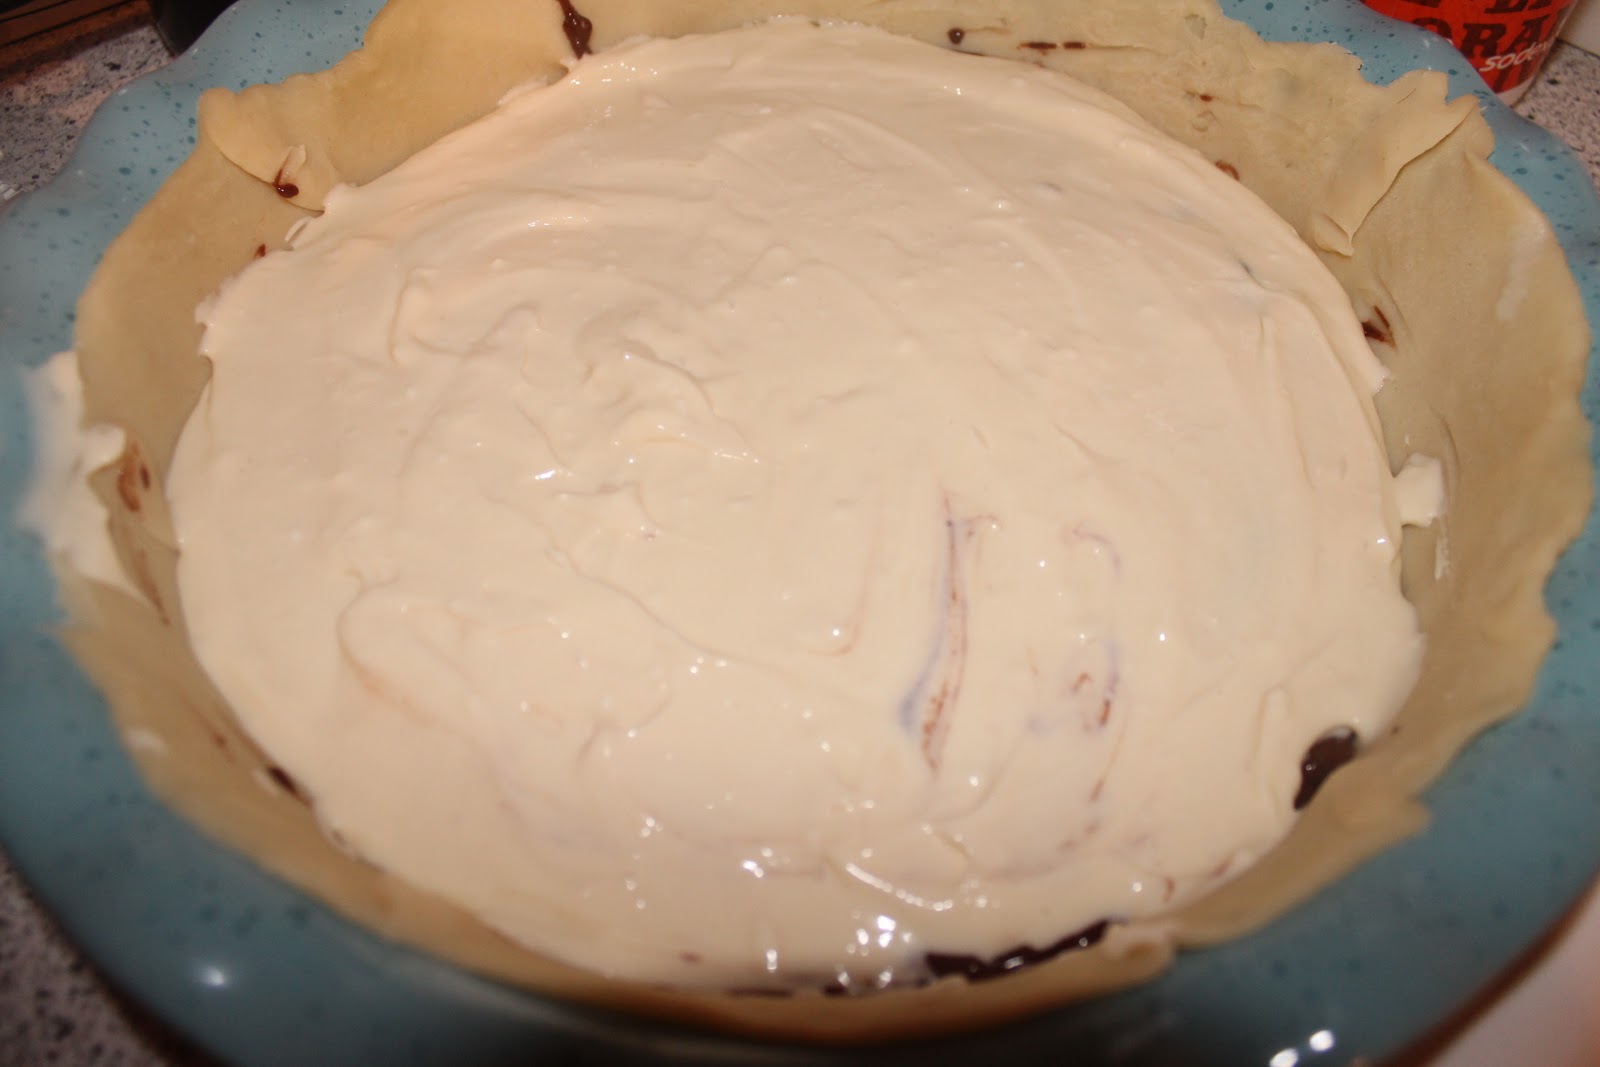
4) In a large bowl, mix brownie mix, 1 egg, oil and water. Beat 50 strokes. Spread half of brownie mixture into raw pie shell.

5) Carefully spread cream cheese mixture over brownie layer. Sprinkle chocolate chips over cream cheese layer; top with remaining brownie mixture and sprinkle nuts on top.


6) Bake for 40-50 minutes or until center puffs and crust is brown. Warm sauce in microwave.


Pretty

As usual I couldn't wait to dig into the chocolaty goodness and I cut a slice too soon....it just tasted like a really, really, extremely hot brownie! Be patient, grasshopper. Oh yeah, and one more thing.....ENJOY!!


GOT MOTIVATION?

Monday, November 7, 2011

Electronics for Dummies

Although I can usually be found with a phone in my hand and a computer on my lap each night, I would put myself in the dummy category when it comes to electronics. I keep it simple when it comes to anything techy. That's why I'm excited to share a couple new items that I have quickly fallen in love with and I'm beginning to wonder why I just now found out about them. I am posting these at the risk of looking like a behind-the-times fool but there may just be other tech dummies out there who are as surprised as I was to find such things.


#1: Laptop chill pad

So chill....

I had no earthly idea that such a device existed. Instead of using one I've been burning my lap and the skin on my thighs for months now. Not to mention raising my body temperature and arguing with Riley about whether it's hot in the house or not. To me it's always hot because this laptop is glued to my lap after 8:30 each night. I was browsing the electronic department at Walmart the other day and stumbled upon this fascinating device that I'm sure has been around since the stone age but has somehow escaped me. Ah ha!! No longer!  I snatched one of those puppies up and my lap has thanked me for it every night since then. ;)


#2: E-Touch gloves


Just your regular, everyday gloves?

Not at all!

Cool. Cool. Cool. These are too cool. Turns out they are actually to keep you cool while you are warm. What do I mean by this? Well you can stay cool by using your social media, texting and dialing on your phone while still wearing your gloves. Don't you hate it when you have to rip off one glove just to read a text or answer a call? Or the people at football games who have cut off the tip of the glove to expose their texting thumbs? No more my friends. These handy dandy gloves are everywhere these days apparently (or so I found out after doing a quick internet search). Like I said, I'm behind with the times. But for those of you still in Little House on the Prairie times with me, these gloves are the best invention since the snooze button. Mine are from Posh in Enid but I found many different brands after searching Amazon.

There you have it....I'm a dummy. And if you are too then maybe now you are a little less of a dummy. ;) But this goes both ways fellow dummies.....if you find something cool you must notify me immediately! ;)


GOT MOTIVATION?

Saturday, November 5, 2011

BONUS Dessert: Cheesecake Cookies

Who said that the dish only does desserts on Tuesdays? Well I'm changing the rules RIGHT NOW!!! I've been wanting to bake these for awhile now but keep forgetting. They are Paula Dean's recipe y'all (said in my best southern accent, of course). The most surprising part is that the recipe only calls for one stick of butter. Ok, this can't be Paula's y'all!!!


Prep Time: 10 minutes
Cook Time: 35 minutes

Ingredients:

Crust:
  • 1 cup all-purpose flour
  • 1/4 cup packed light brown sugar
  • 1 cup chopped pecans
  • 1 stick butter, melted

Filling:

  • 2 (8-ounce) packages cream cheese, softened
  • 1 cup granulated sugar
  • 3 eggs
  • 1 teaspoon pure vanilla or almond extract
  • Fresh berries and mint leaves, for garnish

Directions:

1) Preheat oven to 350 degrees F.


2) Combine flour, brown sugar, pecans, and butter in bowl. Press dough into an ungreased 13 by 9 by 2-inch pan. Bake for 12 to 15 minutes or until lightly browned.


3) For filling, beat cream cheese and granulated sugar together in a bowl until smooth, using a handheld electric mixer; add eggs and extract; beat well. Pour over crust.


4) Bake for 20 minutes. Cool completely.


5) Cut into squares before serving.


Here's a tip from yours truly....make sure and don't forget to follow step #2. Yeah, that's right. I didn't bake the crust first and only realized this midway through baking the cookies. Which tells me two things. #1, I need to pay more attention. #2, these cookies can only get more delicious is I follow the directions!? I threw some pretty blueberries and raspberries on top to pretty it up. The taste speaks for itself so no pretties needed if you don't already have any ready in your fridge. Oh yeah, one more thing....ENJOY!!


GOT MOTIVATION?